How to Set Up cPanel Webmai Email in Outlook: A Step-by-Step Guide
Email applications like Outlook are invaluable tools for managing multiple email addresses efficiently. They eliminate the need for constant sign-ins across various platforms, streamlining communication. This article will guide you through setting up your cPanel email account in Outlook for versions 2016, 2019, 2021, and Outlook 365.
Prerequisites
Before you begin, ensure you have the following:
- Your email account details
- Access to your cPanel via the WHMCS client area
- Outlook 2016, 2019, 2021, or Outlook 365 installed on your computer
If you’ve recently set up an email account through cPanel and want to use Outlook to manage your emails, you’re in the right place. This step-by-step guide will walk you through the process of configuring your cPanel webmail email with Outlook, ensuring you can send and receive emails seamlessly.
Why Use Outlook with cPanel Webmail Email?
Outlook is a powerful email client that provides various features such as calendar integration, task management, and robust organizational tools. By configuring your cPanel email with Outlook, you can enjoy a more streamlined email experience.
Step-by-Step Guide to Set Up cPanel Webmail Email with Outlook
Step 1: Gather Your Email Information
Before you begin the setup process, ensure you have the following details from your cPanel account:
- Email Address: Your full email address (e.g., user@example.com).
- Password: The password you set up for your email account.
- Incoming Mail Server (IMAP/POP3): This is usually in the format
mail.example.comor the IP address of your server. - Outgoing Mail Server (SMTP): This is also typically
mail.example.com. - Incoming/Outgoing Port Numbers:
- IMAP: 993 (SSL) or 143 (Non-SSL)
- POP3: 995 (SSL) or 110 (Non-SSL)
- SMTP: 465 (SSL) or 587 (Non-SSL)
Step 2: Open Outlook and Add an Account
- Open Microsoft Outlook.
- Click on File in the top left corner.
- Click on Add Account.
Step 3: Enter Your Email Information
- In the Add Account window, select Manual setup or additional server types, then click Next.
- Choose POP or IMAP and click Next.
Step 4: Configure Account Settings
Fill in the following fields:
- Your Name: Your name as you want it to appear to recipients.
- Email Address: Your full cPanel email address.
- Account Type: Select either IMAP or POP3 (IMAP is recommended for syncing across devices).
- Incoming Mail Server: Enter the incoming mail server address (e.g.,
mail.example.com). - Outgoing Mail Server (SMTP): Enter the outgoing mail server address (e.g.,
mail.example.com). - User Name: Your full email address again.
- Password: Your email account password.
Step 5: More Settings
- Click on More Settings.
- Go to the Outgoing Server tab and check My outgoing server (SMTP) requires authentication. Ensure Use same settings as my incoming mail server is selected.
- Switch to the Advanced tab. Enter the port numbers you gathered earlier:
- Incoming Server: Enter 993 for IMAP or 995 for POP3.
- Use the following type of encrypted connection: Select SSL from the drop-down menu.
- Outgoing Server (SMTP): Enter 465 for SSL or 587 for TLS.
- Select SSL/TLS for the encryption type.
Step 6: Test Account Settings
- Click OK to save your settings, then click Next in the Add Account window.
- Outlook will test your account settings. If everything is correct, you should see a success message. Click Close.
Step 7: Finish Setup
- Click Finish to complete the setup.
- Your cPanel email account is now configured in Outlook. You can start sending and receiving emails!
Troubleshooting Common Issues
- Incorrect Password: Double-check your password if you’re having trouble connecting.
- Firewall Issues: Ensure your firewall or antivirus isn’t blocking Outlook from connecting to your email server.
- Port Conflicts: Verify that the ports you are using are correct and not blocked by your internet service provider.
Conclusion
Setting up your cPanel email in Outlook can significantly enhance your email management experience. By following these steps, you can configure your email account quickly and start taking advantage of Outlook’s features. If you encounter any issues, refer back to this guide, or consider reaching out to your hosting provider for further assistance.
Ready to Get Started?
If you haven’t set up your cPanel email yet, log in to your cPanel account and create your email address today. Once you have your email account ready, follow the steps above to configure it in Outlook and enjoy seamless communication.
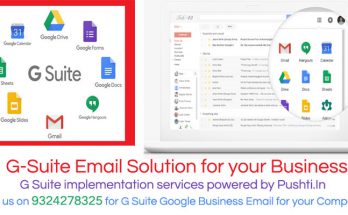
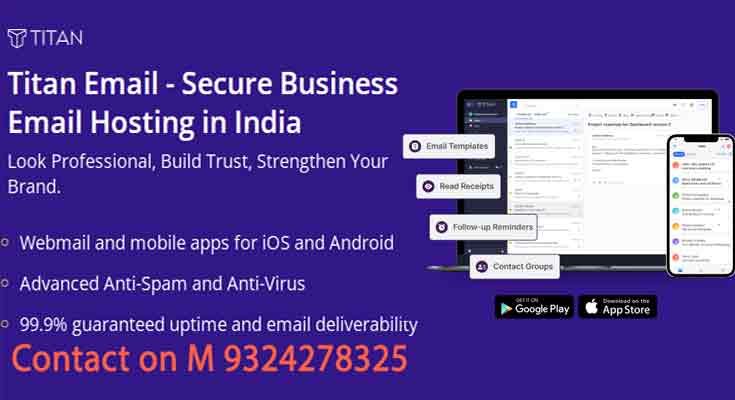
Titan Professional Business Email
A professional email account will make your brand look more credible. Host your business email on a secure, encrypted, privacy-guaranteed, and ad-free email service, and add a professional touch to every email that goes out.
Unleash your business potential today.
 Custom email @yourdomain
- 99.9% guaranteed uptime and email deliverability
- Advanced features that help save time and boost productivity
 Custom email @yourdomain
Set Up Your Professional Business Email Hosting in a Few Clicks
| 01 | 02 | 03 |
Select an Email Hosting PlanWe provide 10GB Mailbox space per email id called Business For Solopreneurs and 50GB Mailbox space per email id called Enterprise For Growing Businesses. |
Proceed to checkoutSelect the number of mailboxes and subscription period 1 year or more. Once you’ve completed the payment process, you will be able to access your business email address dashboard. |
Configure your email hostingFinally, create a business email account based on your own domain name, like youremail@yourdomain.com, set up the DNS settings, and sync your email to other devices. That’s it – you can start sending your emails. |
Choose a Titan Professional Business Email Hosting Plan
| Business Email Plans |
PROFESSIONAL
For Bloggers 5GB Mailbox Space per Emil id |
BUSINESS
For Solopreneurs 10GB Mailbox Space per Emil id |
ENTERPRISE
For Growing Businesses 50GB Mailbox Space per Emil id |
| Email platform | |||
| Email Storage(per email account) | 5GB | 10GB | 50GB |
| Rich Webmail, and native apps for iOS and Android |  |
|
|
| Inbuilt Calendar and Contacts | |
|
|
| Advanced Anti-virus |  |
|
|
| Advanced Anti-spam | |
|
|
| Advanced features | |||
| Multi-account Support | |
|
|
| External Forwarders | 1 | 3 | 3 |
| Read Receipts | |
10 | Unlimited |
| Email Templates | |
1 | Unlimited |
| Contact Groups | |
1 | Unlimited |
| Send Later | |
|
|
| Priority Inbox | |
|
|
| Grammar and Spell Check | |
|
|
| Follow-up Reminders | |
|
|
| Turbo Search | |
|
|
| HTML in Composer | |
|
|
| Send as Alias | |
|
|
| Two-Factor Authentication | |
|
|
| Undo Send | |
|
|
| Block Sender | |
|
|
| Allowlist | |
|
|
| Interface and service | |||
| HTML Signatures | |
|
|
| Auto-reply | |
|
|
| Advanced Search | |
|
|
| One-click import of existing emails & contacts | |
|
|
| Data Encryption | |
|
|
| Custom DKIM support | |
|
|
| Email Transfer Rules | |
|
|
| IMAP/POP3 Support | |
|
|
| Email Alias | 1/mbx | 10/mbx | 10/mbx |
| Catch-all Account | |
|
|
| Email Forwarding | |
|
|
| Customer service & support | |||
| Free Setup | |
|
|
| 24×7 Chat Support | |
|
|
| 24×7 Email Support | |
|
|
Tools to Help You Make the Most of Your Titan Business Email
 |
 |
 |
|
One-click Import Transfer your business emails and contacts to Titan effortlessly with a single click. Eliminate the hassle of managing multiple accounts and enjoy a unified, professional business email experience.Bring your existing emails and contacts from other accounts into Titan so you don’t have to keep switching between accounts. |
Multi-account Support Effortlessly manage various business email IDs like ‘sales@domain.com’ and ‘info@domain.com’ with Titan’s multi-account support. Switch between accounts smoothly, keeping your professional communications organized and efficient.Set up essential mailboxes such as sales@domain.com and info@domain.com, and switch between them in one interface. |
Inbuilt Calendar & Contacts Collaborate effectively by sharing your calendar with contacts and storing key details about them. This integration boosts the functionality of your professional business email, making teamwork and organization seamless.Share your Calendar with contacts to collaborate easily. Also store relevant details about your contacts. |
 |
 |
 |
|
Auto-reply Automatically respond to business emails while you’re away, so no sender is left waiting. Keep your communication professional and prompt, even when you’re not around.Automatically reply to incoming emails while you are away to avoid keeping your senders waiting. |
Block Sender Keep unwanted emails out of your inbox by blocking specific email addresses or entire domains. This feature ensures your professional business email remains clutter-free.Keep emails from unwanted senders out of your inbox. Block specific email addresses, or all emails from a certain domain. |
Send as Alias Enjoy greater privacy and flexibility while communicating professionally. Send business emails using an alias identity to keep your primary business email ID hidden.Send emails using your alias identity to keep your primary email address hidden. |
Titan Email Hosting- Frequently Asked Questions

Why do I need email on my domain?
If you're doing business over email, it's critical to establish trust. Anyone can create a free email account and claim to be a business. A custom email address branded with your domain will separate you from the spammers and scammers of the world.
Can I create a business email without a website?
You can create a custom email without a site, but in order to use Titan you will need to own the domain (example: johnsmith.com.) If you don’t have a domain yet, you can get one from .com while signing up for a business email.
Can I migrate my existing emails and contacts from other platforms?
Yes.Titan comes with built-in migration tools to help you easily move existing email data to your Titan account. If you run into trouble with the migration at any point, Titan’s dedicated support staff is available 24/7 to help you out.
Can I access my email account on a mobile device?
Yes. In addition to being accessible on all major web browsers, Titan has native apps for Android and iOS devices.
Does Titan include a spam filter?
Yes. Titan comes with advanced anti-spam, where all inbound email messages pass through a spam filter before reaching your inbox. Using Titan will dramatically reduce junk mail and vulnerability to viruses.
Can I migrate my existing accounts to Titan?
Yes. Titan comes with built-in migration tools to help you easily move existing email data to your Titan account. If you run into trouble with the migration at any point, our dedicated support staff is available 24/7 to help you out.
How much storage space will I get per email account?
The storage capacity for your business email depends on the type of email account you choose. For Example, if you choose our Enterprise business email plan it offers 50 GB of email storage. While our business email plan offers 10 GB of storage.
What should I do if my business email IDis already taken?
If your business email ID is already taken, don’t worry—there are several ways to create a unique and memorable address. You can try using a different domain name or altering the order of your first and last names.
For instance, if `seoexpertgaurang@yourdomain.com` is unavailable, consider options like `gaurangseoexpert@yourdomain.com`, `gaurangseo@yourdomain.com`, or `gaurang.goradiya@yourdomain.com`. These variations can help you find a business email ID that’s both professional and easy to remember.
How do I set up my business email?
Setting up your business email is a simple process. Here’s a guide on how to set up your Pushti.In's business email:
Step 1: Change your domain name’s name servers
- Login to your Control Panel.
- Search for the domain where you have bought this Business Email Order and navigate to the Order Information view.
- Click the Name Server Details link. Here, you will find the Name Servers that you need to set for your domain.
If you don’t use Pushti.In's Name Servers or update your domain’s MX Records, you won’t be able to receive emails on your domain. Basically, you need to set things up correctly to get emails sent to your domain name.
Step 2: Create email accounts
Once the service is activated, you need to create email accounts to send and receive emails. You can also set up aliases, email forwards, mailing lists, and so on from your Email Administration Interface.
Step 3: Send and receive emails using the business email accounts
Pushti.In gives you these ways to manage your business email:
- Configure a desktop email client to download and send emails directly from your computer.
- Log in to the web-based interface to access your emails online from any device.
You can now easily send and receive emails using your business email either through the Webmail interface or by using a desktop client.
Why do I need a branded professional business email ID?
Having a branded professional business email ID is essential for establishing a professional image and building trust with clients and partners. A business email address, such as `yourname@yourcompany.com`, not only reinforces your brand identity but also ensures that your communications are taken seriously.
Additionally, having a business email helps separate personal and professional emails, making your business more organized and secure. Moreover, many business email plans offer enhanced features for business email IDs, such as increased storage, better security, and collaboration tools.